Design team member of Alpha Stamps, lover of ephemera and junk.

Welcome! Grab a cold one, kick off your shoes, and have a look around.
Showing posts with label pandemic. Show all posts

Saturday, November 28, 2020

2020 Tree Ornament

2020 has definitely been a year, and I felt the need to commemorate it with a Christmas ornament. Using a wooden ornament from Alpha Stamps, I made this. This will be the perfect reminder of such an imperfect year.

"Our first pandemic. So sweet. That pretty much says it all, yeah? Here's the back.

I love these vintage snowpeople. They have the prettiest smiles. Of course you can't see them, though, as they are wearing their masks. To give this ornament a chalkboard look, I used a white colored pencil for the lettering.


I hope this ornament makes us laugh next year, when we are able to get together again with friends and family. Until then, we'll stay safe at home. For a list of supplies used for this project, click here!


Saturday, October 24, 2020

Scary Halloween Sweets and Treats Stand

One last Halloween project for the season: how about some fun mail? My mom mentioned the other day that she never got anything but bills in the mail anymore, so I thought I'd send her a little Halloween treat. Welcome to Alpha Stamps' "Scary Halloween Sweets and Treats" stand. Please be aware of the handy candy corn stickers on the floor that indicate where to stand when ordering your favorite spooky treats; you know we're still in a pandemic.

 
Never mind that the proprietors are deceased; they're still being careful to wear masks and enforce social distancing. Aren't their little candy bags adorable? Those bags are so easy to make using the Retro Halloween Bags collage sheet. A couple of toothpicks hold up the striped awning. I used an awl to punch small holes in the stand and awning for each end of the toothpicks. Once the card is assembled, a little dab of glue will help keep the toothpicks in place.


The beauty of this little scene is that it folds flat, so I can mail it off in an envelope.
 
A lot of people plan out an entire project before starting it. I am not one of those people. Lots of what I do is trial and error and finding things that work at the last minute. For that reason, before I even started this project, I painted the entire thing black. I know I would be covering it with papers, and that the folds of the card may show.  The only thing I know I wanted to do when I started is have a striped awning, so that was done first. The candy paper was too much fun, so I decided a candy stand was the way to go. Below you can see how that paper was cut to fit the wall of the stand, plus the top of the table in front.
If ever there's a measure twice, cut once situation, this is it. I had one 6x6 piece of this paper. No room for mistakes! Here's the back of the piece, with some directions. The black plaid paper seen below is the back of the candy paper. Once I cut the paper to the correct width of the stand, I measured carefully and cut out the space for the window under the awning. Put the paper on the front. Holding things in place, carefully slice between the stand in the slits on each side of the "no glue here" part pictured below. That will be the top of the table. Cross your fingers, flip over the piece, and carefully glue only where the dotted line is. You don't want to glue your table top until the piece is fully opened. Once you've glued all that, you can carefully trim the extra paper from the top (where it says "trim here"). Once the candy paper is attached correctly, it's relatively easy to cover the front of the stand and the ground.
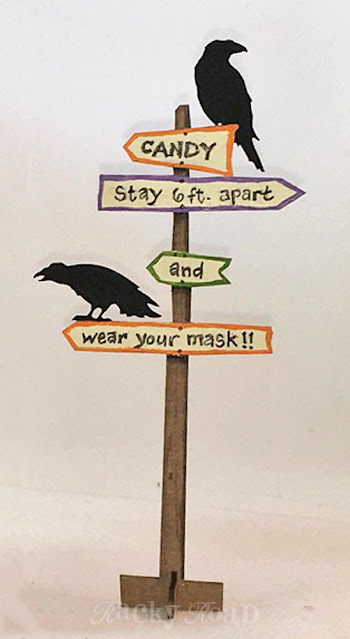
The chipboard sign adds a little fun to the scene. It's painted with acrylics and lettered with a fine line marker. I wanted to give it a hand painted look, so I didn't worry about keeping everything straight.
If you plan to shop at the Scary Halloween Sweet and Treats Stand, don't forget to stay on the candy corn stickers so you don't get sick. Isn't 2020 fun? For a list of supplies, click here.


Saturday, July 11, 2020

Faux Florida Vacation

Oh, coronavirus. We are still sheltering at home. As of today, it's been 121 days since our lives were normal. Since we most likely won't be traveling any time soon, I used this month's Alpha Stamps kit to make a little faux Florida vacation home. It's the next best thing to actually traveling somewhere other than my own backyard. And look, some of my friends are already there!
The front is hinged at the bottom, using green paper. On the outside, it may look like there's not much to this little house, but when you open it up, it's a true tropical vacation. The beaches are crowded, people are splashing in the waves, and some lucky guy even caught some fish for dinner. Bonus: no social distancing required.

Don't miss the cute little crab charm in the lower right corner of the niche!

Nothing like a comfy chair and a good book (plus a bucket full of cold beverages!) to make my faux vacation the perfect place to relax.

Here's a closeup of the niche and those cute miniatures.

The front panel of the house is held in place by the flag pole, which is actually a glass ball sewing pin. It's just gently pushed through the apex of the roof, right in front of the house facade. To allow the panel to drop down, you just have to lift the flag. You can just see the pointy end of the flag pole circled below.

I'm so in love with the floral paper and vintage Florida postcards combination. It's busy and fun and exciting, which is unlike my life at home right now. Someday we'll travel again, but until then, this little faux vacation house will have to do.
For a complete list of supplies, click here!

Wednesday, April 15, 2020

Covid-19, A Little Journal

Like most of the world, I have been sheltering in place for the last 34 days (yes, I'm keeping count). Crafting has been great entertainment, and one might even say, therapy. Making this Covid-19 journal certainly was that for me.

I cut up a lot of newspaper in the making of this book; the background paper for all the pages was created by gluing articles about the virus to the covers (made from a House Shaped ATC Frame set), and each of the pages, which are thin cardboard cut to size. I gave each page a thin layer of acrylic paint, a little ink, and some paint details. The type fades into the background, but if you look closely, you can still see lots of what it says. Anyway, enough chatter, let's look at photos.
The front cover. Hopefully this conveys the feeling of being stuck inside. I started out with just the "metal" bars, but then added the red arch to make it seem more restrictive. Even that didn't seem enough, so I added the "call again" emergency tape. Part of the beauty of having tons of collage sheets is finding something that just works. That emergency tape is actually a small cigar band image from the Mini Cigar Box Trims collage sheet.  Like all of the type throughout the book, with the exception of the snarky captions, the "COVID-19" title and the "shelter-in-place" type were also cut from the paper.

The expression on this face is everything.  All she needed was a mask, which I drew with colored pencils on a piece of typing paper, then cut out and glued down. My light table came in handy to show the shape of her face and and enable me to make the mask fit properly.

The bars on the inside started out as a decorative gate; I just cut off all the ornamental part, shortened them up a bit and painted them grey. Jail cell!

I don't know about you, but my husband and I are definitely enjoying some special snacks during this time, including Cheez doodles and peanut M&Ms. We are taking care not to overdo it, though, unlike this poor woman, who is obviously lacking a bit of self control.  Definitely a "state of emergency". I found this image of Cheez Doodles online, and sized it to fit. The tiny doodles on the left hand page were drawn with colored pencils.

As someone who really doesn't mind spending a lot of time at home (when it's by choice!), I did note that other than not having the option of going out, some things hadn't really changed. I did, however, quit using a hairdryer and wearing makeup and jewelry, and we do seem to go through the alcohol faster than usual.

It can be hard to be isolated with family members for long periods of time. I think this page is self-explanatory. Not to worry, though, so far no one here has needed severe "correction". This knife was drawn with a silver Sharpie.

And the back cover. I'm sure you agree. For a complete list of supplies, click here.
*I hope that neither you nor any of your friends or family has been infected with this terrible virus. Please know that this book is not meant in any way to make light of this serious pandemic. My family has been very strict in socially isolating, and this is just my way of coping a bit. Stay safe out there!*
Related Posts Plugin for WordPress, Blogger...