This piece was made almost exclusively from Alpha Stamps supplies, with the exception of some vintage buttons and an old button card. Because the buttons are "American Maid Pearls", I gave the Sewing Queen a pearl brooch and a pearl-encrusted crown.

Vintage buttons on the sides.

One of the Queen's besties appears on the back. Don't you just love those tiny thread spools and all the little pairs of scissors? The wooden star button at the top was tied with a bit of baker's twine, and than glued onto a vintage white button before attaching it to the shrine. Two small scissors are at the bottom. A Queen needs her scissors!

The roof is shingled with pieces of a vintage pin strip.


I really liked the round frame with dragon, so the first step was to determine placement. I used it upside down, electing to use the dragons as "scrolls".

Make the niche that the sewing machine will fit into: glue some scrapbook paper to a piece of shirt cardboard. Using a circle template, trace a circle onto it that is just a little smaller than the outer edge of the chipboard frame. Cut it out with scissors.
In this photo, you can see the circle that will be the back of the niche, next to the as yet undecorated frame. At the bottom of the photo is the "wall" of the niche. The flat part of the wall is scored with a bone folder to the desired depth of the niche, and tabs are cut to the fold line.
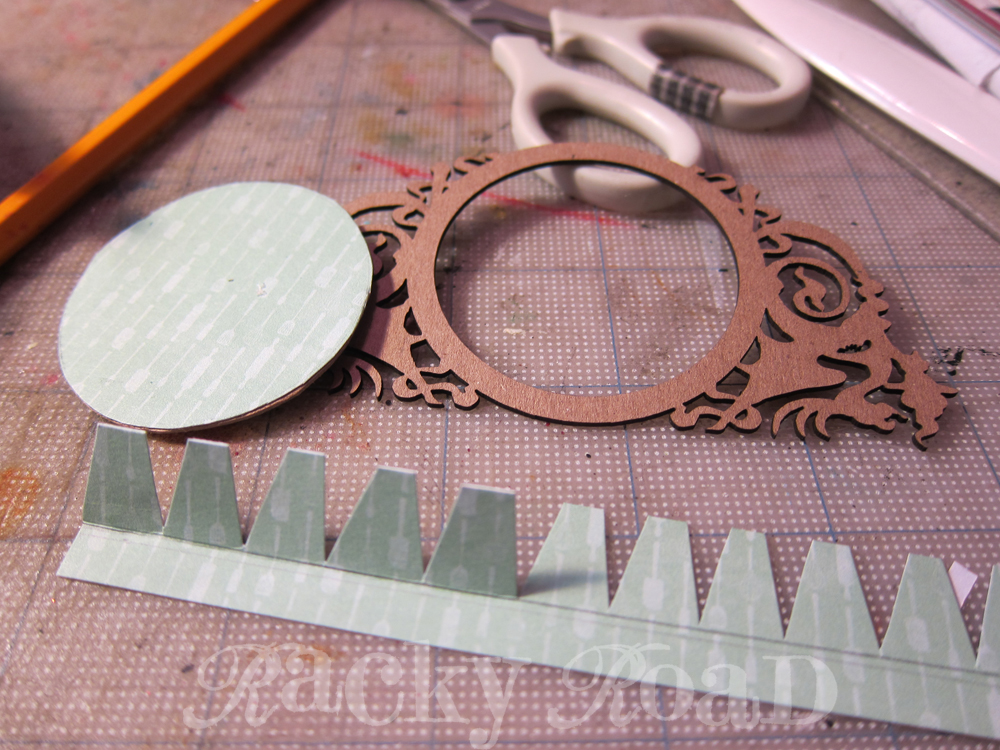
Bend all the tabs up, and then wrap them around the back of the cardboard circle, forming sides. Glue in place. Add another circle of scrapbook paper to the back. This will not show, but will help assure that the tabs stay adhered. Attach the sewing machine to the back of the niche as instructed above.

Make a support to fit under the niche so it doesn't sag! Measure the depth of the interior of the shrine and using sturdy cardboard, create the support like so. Add a piece of scrapbook paper to the side that will show when the support is in place.

Here's the niche with the machine adhered, glued to the top of the shine and sitting on the cardboard support.

Now decorate your frame with paints, colored pencils, and pearls, and glue it on top. Done! Don't forget to add those adorable scissors to the apex of the roof.
Here's to all you Sewing Queens out there. Happy stitching! For a complete list of supplies, click here.
