Design team member of Alpha Stamps, lover of ephemera and junk.

Welcome! Grab a cold one, kick off your shoes, and have a look around.

Saturday, May 31, 2014

Animal Farm, the musical. Now with medallion tutorial.

What's up this month at Alpha Stamps? Paper theaters! I used the Small Paper Theater Box and some of the scrumptious theater backgrounds from collage sheets to make a theater base, and then had a marvelous time making it luxurious. I used all kinds of embellishments: flatback rhinestone studs, metal hands and stars, gold Sweeper Fringe, matchsticks, and a scallop shell charm, to name a few (Don't worry, there's a link to my supply list at the bottom of this post!)  There are even a few rhinestone stars floating down from the ceiling; they're attached with threads.

Who are the players in this fancy-schmancy venue? After some deliberation, I chose some great animal images from the Circus Animals collage sheets. The animals are in rehearsal for opening night of "Animal Farm, the musical". I just had to give them all googly eyes, as they looked like they were having such fun. Well, most of them, anyway. Ronnie Rooster is a little ticked off that he's not listed as one of the stars. He's folded up his music and is just about ready to stomp off the stage in defeat.

The characters are all stacked up with dimensional foam, and I folded some of the edges of the music scores in their little hands to give them even more dimension. The Animal Farm banner is made using a rubber stamp (Large Center Banner). The title of the play is hand lettered. I cheated on the sign on the side; I printed the animals' names out and then drew and cut out that banner. It's hanging from a pole made from a couple of matchsticks. Baker's twine was used for the cord.

Want to know how I made the folded paper medallion that's behind the star on top?

It's easier than it looks, especially if you have a scoring board. Here's how:
1. Cut a strip of paper 12" long, and a little less than half the diameter you wish your medallion to be. The strip I'm using in this tutorial is 1 1/4" wide, and the finished medallion is a little over 2 1/2" in diameter. 

2. Place the strip along the top and side guidelines of the scoring board, and using the scoring utensil, score every 1/2" (on the Martha Stewart board, shown here, you would score on each dot.) Your paper is longer than the board, so when you get to the edge of the board in your scoring, simply slide your paper over to the left to continue scoring your strip.

3. Once you have scored every 1/2", flip the paper over and score between each scored area. Now you will have a score line every 1/4". Flipping the paper makes it easier to fold.

 4. Finish scoring all the way to the end, and then fold the strip accordion-fashioned.

5. In order to join your medallion correctly, you'll need to cut off one of the ends at the first fold. 

6. Put a strip of double stick tape on one end, and bring the other end around (your strip should be in a circle now). Attach firmly.

7. Here's the tricky part: stand the strip up on one edge, and using both your hands, gently press the top edge down to the middle. Take a circle, coat it up well with glue, and place it on the center, holding firmly. I use white glue, and then set the medallion under a stack of books to set.

8. Once it's set, you have a festive medallion. 

For a list of supplies used in this project, click here. And enjoy the show!

Saturday, May 10, 2014

Springtime in Paris, OR "Clarence Photobombs in France"

Alpha Stamps' theme for May is Springtime in Paris. Ah, so romantic. I'm not all that sappy, though, so I took a bit of a different tact. One of the collage sheets we were given is "Paris Postcards", which have reduced images of actual vintage postcards of France. I collect vintage postcards, so I really love this collage sheet. The colors and images are really wonderful. I decided to mount them on some artist trading blocks and other wooden blocks that I painted and then sanded. My original plan was to add other elements on top of the images for a Paris collage, but I loved the way the blocks looked with just the postcards on them, and I just couldn't bear to cover them up.

Enter Clarence. He just couldn't help inserting himself into every frame. 

I don't know...it just cracks me up.

I did at least collage the backs of the blocks.

But I prefer Clarence.

For a complete list of supplies, click here.

Wednesday, April 30, 2014

ATC Book Bee Shrine

I have a friend who is a beekeeper. We did a swap together and she asked me to make her a bee shrine. This ATC Book Box is the perfect size! I got some fun papers and some bee charms and set to work. I love using stripey papers on the sides because it reminds me of pages of a book.

When you open it up, this is what you see. The honeycomb pattern was made using a Tim Holtz stencil and some ink. I made a faux front for the inside niche, and added a large Victorian bee charm that was given a copper patina.

Here's what you would find if you were to remove the faux front: I painted the interior a metallic copper color for reflectivity, and added a battery operated tea light. The cardboard pieces you see along the walls are for support, so that when you add the wall, it will have a nice place to sit.

Look how cool it looks in the dark! It's fun using light as one of the "supplies" for projects.

The ATC Book Box comes with some tags, so I embellished them a bit and added them in for my friend to use later for gift tags. Love that beehive stamp! I also used it on the spine of the box.

As always, most of my supplies, including the beehive stamp and the ATC Book Box, came from Alpha Stamps. For a supply list and links to purchase, click here.

Thursday, April 24, 2014

Online Class Adventure with Kathie Vezzani

One of the greatest things about going to the Art Is You retreat (art camp) last fall was making new friends, and one of my favorite new friends from camp is Kathie Vezzani. We seemed to just click. She is very talented, and lots of fun to be with. It's probably good we don't live closer to each other; I think we could get into trouble together.

Kathie is getting ready to teach an online class through Jeanne Oliver, entitled Plaster and Wax 101 {illuminated portraits from within}. I'm not a painter, and have little or no experience with Plaster or Wax, but Kathie has assured me that the "101" in the title means that she will be explaining everything so that even a beginner like me will have good results.
Isn't her work amazing? I'm excited about learning something new. Here's a description of the class:

Plaster is a luscious, absorbent surface that begs to be scraped, carved, sanded and painted. Kathie Vezzani will take you on a journey to paint your own masterpiece. She will go over the basics of painting a face, show you how to paint a “pretty face, “ then using her own style, show you that you don’t have to paint realistic faces that conform to the rules.
When finished, she will show you how to apply layers of encaustic medium to make your painting seem illuminated from within, adding oil paint to soften the edges or add splashes of color. This two week course will be full of painting, plaster and encaustic (pigments mixed with hot wax) creating!  Wax is the perfect compliment to any mixed media, oil or acrylic painting you are already skilled in.

Registration for the class is now open, and if you sign up by May 1st, the fee is only $29. It's a two week class, and is open for a year. Join Jeanne on her blog because she is giving away encaustic supplies and Kathie Vezzani is giving away an original encaustic painting if you register. Wow, how exciting is that? To read more and/or register click here.

I hope that someday soon, I'll have some beautiful paintings to show off on my blog. I can't wait for the class to start.

Saturday, April 12, 2014

Luck of the Irish: A Leprechaun

I did a swap with a friend on Craftster, and one thing she said she'd really like is something Irish.  I saw she had some cute leprechauns posted on Pinterest, and thought it would be fun to try and make her one. I am not a clay person, but I had some paper clay and really wanted to give it a shot. I know a lot of people use foil as the bases for clay things, but for the shape of this guy, I used a plastic Easter egg. The egg was a nice smooth surface to work on. If I were to do it again, I'd glue it shut before working with it, because for a while there, it was popping open and that was a bit frustrating, to say the least.

So here he is, with his lovely egg-shaped figure. I used inks to age him and glaze to make him shiny.

My daughter found the rusty shamrock years ago. It's the perfect thing for him to hold, and really helped me deal with the question of what to do with his arms.

Because he was formed over an egg, he didn't sit well at all, until I gave him a bit of a bum.

Here's a closeup of his freckly face.

Wednesday, April 2, 2014

A Litte Foolery

Craftster.org is always a fun place to be on April 1st. This year we celebrated April Fool's by going a little nutty. All the moderators made project involving nuts. There was an exfoliating soap, some votive candles made of peanut shells, lovely jewelry, and much more. Here's my project, entitled "Nutterflies Are Free".

Lovely butterflies in a desktop display, with a hopeful caterpillar crawling nearby. The plaque on the front reads, "reality has limits, imagination is boundless". Perfect, don't you think?

Here's a closeup of my "masterpiece".

Such fun!

Saturday, March 29, 2014

Summer Memory Mini Book

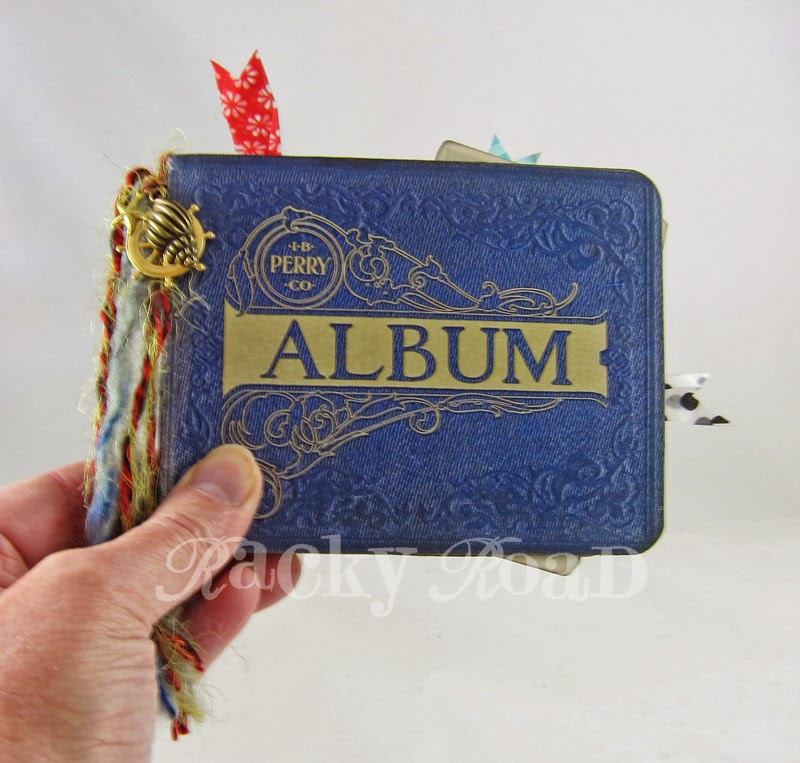
What's new this month at Alpha Stamps? Vintage albums with a beachy vibe! Here's a little souvenir album I created with all the fun new products. Hopefully it brings to mind someone's long ago summer fun memories.

The cover. The book is such a fatty that it needs clips to keep it closed. Thank goodness washi tape can make a plain black clip a little more fun! Can you believe that cover is from a collage sheet image, just glued to shirt cardboard? It looks like real leather!

All the inside pages of the album are made from 7Gypsies scrapbook papers. All splayed open:

I used a combination of collage sheets, vintage photos from my collection, fun little envelopes, and rubdown numbers. Here are the rest of the pages. I won't bother you with too much chatter about each one. I'll let most of them speak for themselves.


Tag removed:


A great old photo of two couples on vacation, and some tickets.

I love using the glassine envelopes. Hole reinforcements make a great grabby spot for some baker's twine so you can pull the tags out.

One more picture of the couples, Gus, Irene, Maddie, and Al. Those are their real names, they're written on the back of the photo.

This photo is from a collage sheet. The paperclips have washi tape flags on them.

Last page.


Wanna make a fun memory book like this one? For a list of where to find most of the supplies, click here.
Related Posts Plugin for WordPress, Blogger...