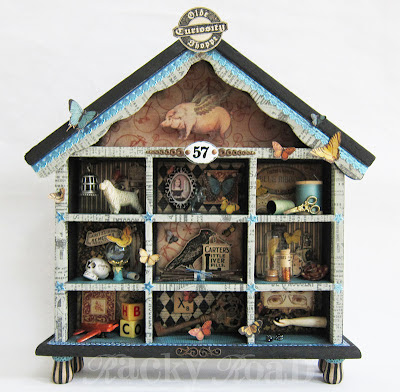
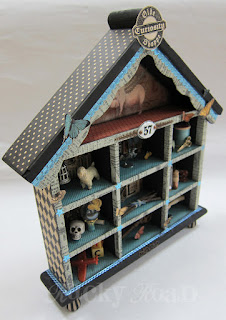
I think it's no secret that I'm a huge fan of Graphic45 papers, so when Leslie, of Alpha Stamps, asked if I would do a tutorial using their new "Olde Curiosity Shoppe" line, I was more than happy to comply. I had this rather shoddy little house with cubbies that I found at the thrift store for 79 cents (bargain!) and here's what I came up with:
Here's how it was done:
 Find a
good object to alter. I had a lucky day at the thrift store and found this
little house with cubbies for only 79 cents. Gather your supplies. For this project, I used an 8" by 8" pad of Graphic 45 "Olde Curiosity Shoppe" paper, plus a few of their bigger sheets. Also, lots of fun little toys and trinkets, many available from Alpha Stamps.
  Paint
the entire item black, and choose several coordinating papers for the
background of each box. Cut to size, and ink around the edges.
  Using
Tim Holtz paper tape, cover the edges of each partition. Trim the tape at
each intersection, and fold the edges down to wrap the edges of the walls.
  Choose
a different paper for the floors of each box, and cut to fit. Ink around
the edges, and glue into place.
  Cut
design elements from the papers and begin to arrange them in the boxes.
When you are sure you know where you want each element to go, attach them
to the back with foam tape to add dimension. I used some of the G45 stamps designed to go with these papers for extra elements. In this photo, the crow in the center and
the Olde Curiosity Shoppe sign were stamped onto heavy cardstock and cut
out for use. Now it’s time to start playing around with things you might
want to include in each box: old wooden spools, doll arms, game pieces,
etc.
  If
you’re going to add feet, paint them in colors to match your project. The
feet used here are wooden candle cups. I striped them, and then painted
the lip turquoise with black polka dots for a little whimsy. Attach to the
bottom woth E6000 glue.
  Keep
working with your elements! If you’re like me, you’re going to want to
move things around quite a bit before you’re happy with placement. Some things may not make the cut, no matter how much you love them. Add
some Dresden trim and some metal embellishments. Cover the back, sides and roof with
papers. Ink the edges before adhering.
  Begin
gluing down your 3D elements using E6000 glue. Cut out several
butterflies. Fold each one in half, put a thin line of glue along the body
of the butterfly, and adhere randomly, making sure the wings stay folded
for a 3D effect.
  And
you’re done! I filled each box with things I already had. Chances are
you’ve got a good stash like this in your craft room.
Here's a close-up of all the cubbies. I love things like this because there's always so much to look at.


Ohhh wow...i love it...this is so great.
ReplyDeleteThanks for sharing this.
Have a wonderful day
Kerstin
Soooooo fabulous!
ReplyDeleteThis is so fantastic!!
ReplyDeleteLove this! Shared it on pinterest so more people could enjoy your lovely work and blog.
ReplyDeleteThis is absolutely fantastic. I love all the details.
ReplyDeleteThanks for the step out photos and tutorial.
What a gorgeous project!! Thank you so much for sharing your steps into creating this amazing little house with cubbies !!!
ReplyDelete