
Here are the pockets and coins before binding. I used a rubber stamp to make the title on the first pocket. Old tickets look fab on the fronts of the rest.

Let's take the coins out!

Circus fun!

Mixed colors and patterns.

Of course I had to decorate the backs a bit as well.

Here are a few in progress photos and comments about how these were made. My first step was to choose which images I wanted to use on the coins. Once those were chosen, I picked paper for the background and glued it on. Each coin then got a border. Some of the borders were made using black sharpies, and some were done with paint and a spotter, which is actually a tool for decorating fingernails. That's one at the lower left. You can get inexpensive sets of those on Amazon.

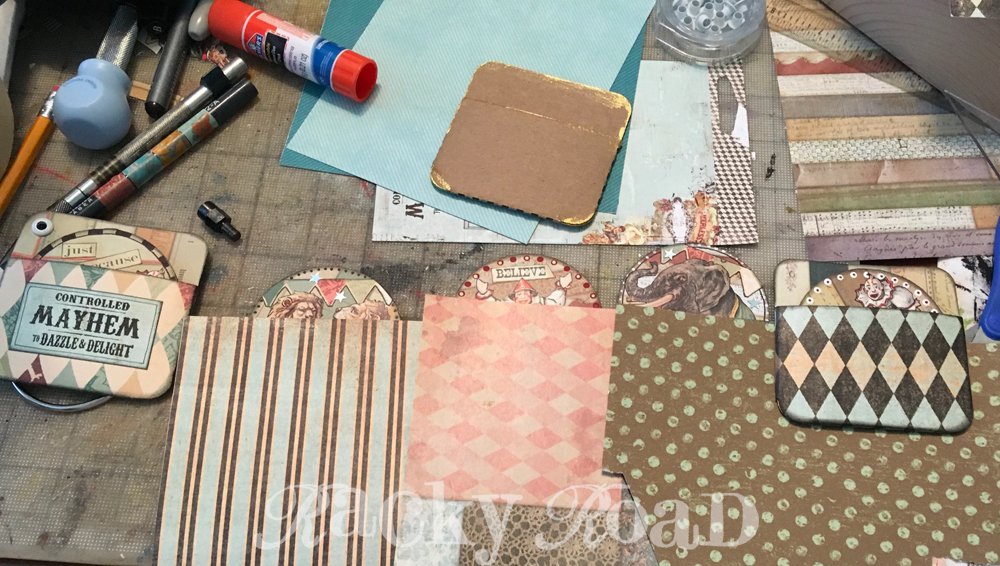
Here's what my table looked like when I was choosing the papers for the pockets. You can see the chipboard pocket at the top center. I painted all the edges with a gold metallic paint for a bit of sparkle. IMPORTANT: When I folded up the pocket and adhered the flaps to form the pocket, I did it with a coin inside to make sure I left enough give in the pocket. If you skip this step, your coin may not fit. Using double stick tape insures the pocket will stick firmly.
The photo below shows the three steps I took in covering the pockets. They can be a little tricky because of the rounded corners, but here's an easy way to deal with that.
1. Put double stick tape all around the straight edges of the pockets.
2. Glue the paper you're using, and line it up with the tape at the top of the pocket. Then flip the pocket over and cut as shown. I used an x-acto blade to carefully cut around the corners. Put double stick tape around the edges of the back of the pocket (I did not want to trust glue to hold those edges!) and carefully fold the edges over.
3. Flip over your pocket, and voila! Use an ink pad to darken the edges if you wish. I went around later with a dry brush of the gold metallic paint and added that to the edges as well.

4. Choose the paper you want to use behind the pocket, and glue that to the front of your pocket. Use and x-acto knife to trim around the top edge.

Once that's done, cover the back, and add a grommet to each pocket.

Thread a binder ring through the grommets, and you've got a fun little trading coin pocket book. Don't forget to add a tassel! For a complete list of supplies, click here.


This little book with ATCoins is so adorable. Love the images and the way you put this all together. Too cute!
ReplyDeleteThis is so cute. I always love the projects you make for Alpha Stamps. Every time I see something you make I have to purchase the items and give it a go. >^..^<
ReplyDeleteBeautiful
ReplyDelete