
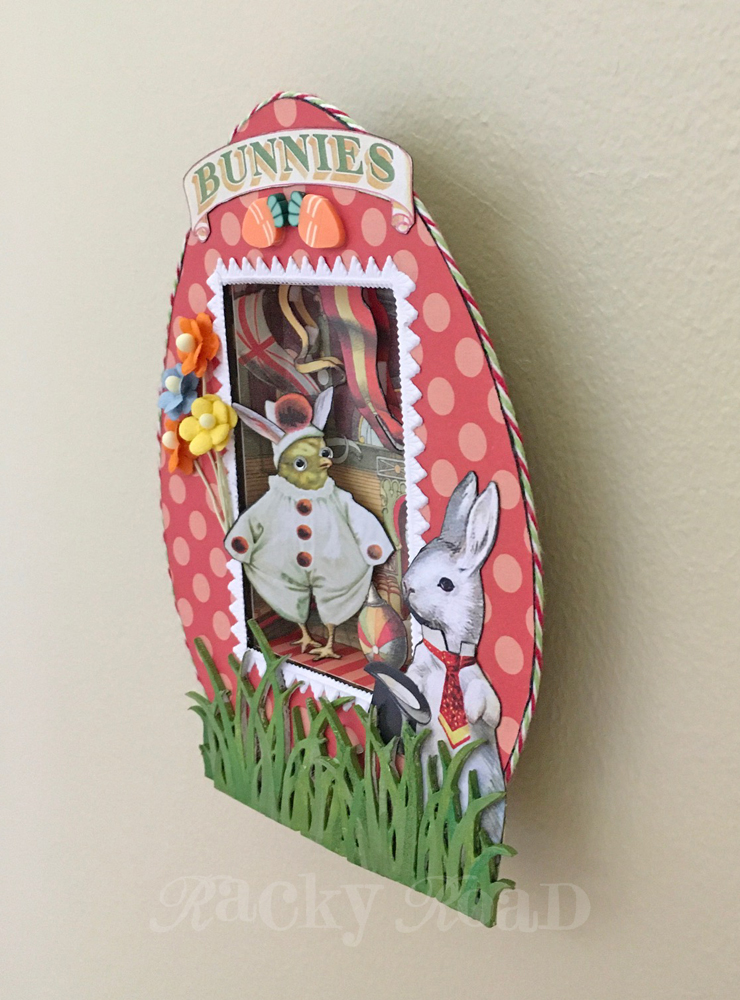
Every circus needs a ringmaster, but the rabbit image I wanted to use had his head facing away from the action. I cut out the body of that rabbit and used the head from a different rabbit from the same collage sheet. Now he's paying attention!

The chick on the collage sheet appears to be wearing an eye patch, so I colored the patch yellow to match his head, and added a couple of crazy eyes. The eyes I used are designed for fishing flies; they were the perfect size for this crazy little clown chick. Because the eyes are plastic, it was easy to trim his left eye so it looks like it sits behind his beak. I also gave him some bunny ears, cut from the original head of the ringmaster bunny. Now he fits in with the other rabbit performers.

Here are a few photos of how this project came together. I first chose the image of the chick, and the circus background, and then the perfect piece of scrapbook paper from the Echo Dot Summer Dots and Stripes 6x6 pad that coordinated with those colors. The dotted paper was glued to the egg, and then carefully trimmed with an x-acto knife. Some baker's twine was glued around the outer edge. The circus image was adhered to the back and sides of the cardboard niche, which was then glued together with white glue. Clothespins work great for holding things together while the glue dries.

The niche was put in place and the flaps glued to the back of the egg. Masking tape held down the flaps during drying time. The hanger was also glued on at this time.

White Dresden trim around the opening reminds me of those sugar eggs with the scene in them that I used to love as a kid. I tried it out to make sure I liked it before gluing it down. In the photo below, the flags in the circus background have not yet been doubled up. That was my next step.

See how the flags pop, now that there's an extra layer? After the egg was put together, the outside was decorated with all the
elements. The chipboard grass was greened up with a combo of paint and colored pencils. I used three clusters to make the Easter grass that the egg sits in.


So spectacular! Linda
ReplyDelete