One last Halloween project for the season: how about some fun mail? My mom mentioned the other day that she never got anything but bills in the mail anymore, so I thought I'd send her a little Halloween treat. Welcome to Alpha Stamps' "Scary Halloween Sweets and Treats" stand. Please be aware of the handy candy corn stickers on the floor that indicate where to stand when ordering your favorite spooky treats; you know we're still in a pandemic.
Never mind that the proprietors are deceased; they're still being
careful to wear masks and enforce social distancing. Aren't their little candy bags adorable? Those bags are so easy to make using the Retro Halloween Bags collage sheet. A couple of toothpicks hold up the striped awning. I used an awl to punch small holes in the stand and awning for each end of the toothpicks. Once the
card is assembled, a little dab of glue will help keep the toothpicks in
place.
The beauty of this little scene is that it folds flat, so I can mail it off in an envelope.
A lot of people plan out an entire project before starting it. I am not one of those people. Lots of what I do is trial and error and finding things that work at the last minute. For that reason, before I even started this project, I painted the entire thing black. I know I would be covering it with papers, and that the folds of the card may show. The only thing I know I wanted to do when I started is have a striped awning, so that was done first. The candy paper was too much fun, so I decided a candy stand was the way to go. Below you can see how that paper was cut to fit the wall of the stand, plus the top of the table in front.If ever there's a measure twice, cut once situation, this is it. I had one 6x6 piece of this paper. No room for mistakes! Here's the back of the piece, with some directions. The black plaid paper seen below is the back of the candy paper. Once I cut the paper to the correct width of the stand, I measured carefully and cut out the space for the window under the awning. Put the paper on the front. Holding things in place, carefully slice between the stand in the slits on each side of the "no glue here" part pictured below. That will be the top of the table. Cross your fingers, flip over the piece, and carefully glue only where the dotted line is. You don't want to glue your table top until the piece is fully opened. Once you've glued all that, you can carefully trim the extra paper from the top (where it says "trim here"). Once the candy paper is attached correctly, it's relatively easy to cover the front of the stand and the ground.
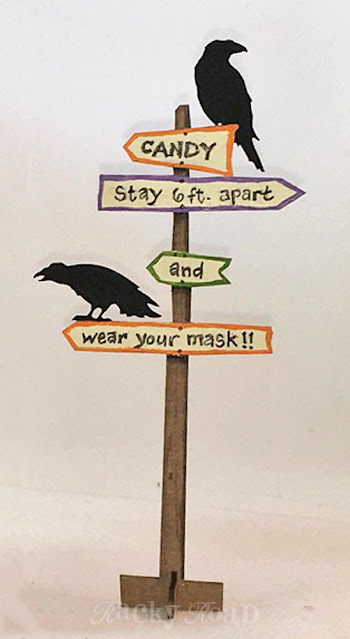
The chipboard sign adds a little fun to the scene. It's painted with acrylics and lettered with a fine line marker. I wanted to give it a hand painted look, so I didn't worry about keeping everything straight.
If you plan to shop at the Scary Halloween Sweet and Treats Stand, don't forget to stay on the candy corn stickers so you don't get sick. Isn't 2020 fun? For a list of supplies, click here.
If you plan to shop at the Scary Halloween Sweet and Treats Stand, don't forget to stay on the candy corn stickers so you don't get sick. Isn't 2020 fun? For a list of supplies, click here.


No comments:
Post a Comment