Design team member of Alpha Stamps, lover of ephemera and junk.

Welcome! Grab a cold one, kick off your shoes, and have a look around.

Wednesday, September 7, 2022

Halloween Produce Stand

Halloween is near, and it's my favorite time of the year! I made a little produce stand to celebrate. The vendor also seems to enjoy Halloween; he's selling more than just fresh produce! I used a 3" Tall Display Base and a Stairstep Tabletop Display from Alpha Stamps to build the perfect stand in which to sell his wares. It's fully stocked with fall goodies: everything from apples to pumpkins to Halloween decor. I'm sure his black cat is not for sale, but you never know!

I assembled the Base and covered it with scrapbook paper, then did the same with the Stairstep Display. They're both easy to put together with a little white glue. I ended up changing the top of the cabinet base later, as the pumpkin pattern was too busy once I started adding the merchandise.

Thin cardboard was used to make the sign for the stand. To keep it sturdy, I glued a couple of toothpicks to the back of the supporting posts. The stripey paper and the sign came from the Fall Market Signage and Labels collage sheet.


Lots of the goods for sale are just as they came: the skull, the jack-o-lantern, the black cat, and the pumpkins, for example, but some got a little extra treatment: I simply removed the corks from the clear bottles, but added labels to the green and the amber bottles. The clear bottles are filled with a Halloween Polymer Clay Mix. Looks like delicious Halloween candy!


The amber bottles are filled with seed beads.

I also added tiny labels to the crates. So cute!


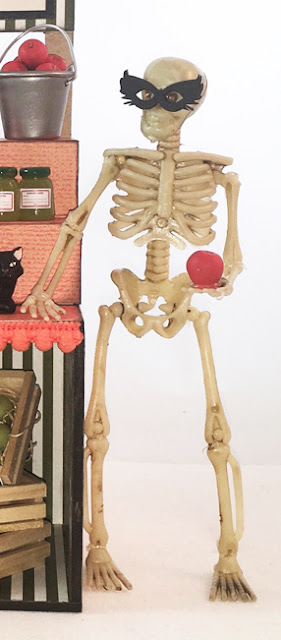
The proprietor is offering you an apple (I hope it's not poison!) This skeleton comes with stiff arms and legs, but it's easy to cut them apart at the joints and, using hot glue, give him a different pose. I cut this guy's arms at the shoulders, elbows, and wrists, and then pieced him back together. Now he can lean on his stand in a jaunty manner.


This stand was so much fun to make and stock up with Halloween What will your stand sell? For a list of supplies I used, click here!


Saturday, April 9, 2022

Animal Family Album

It's been a while since I've done any real crafting, but this family album project had me remembering why I love it so much. Using collage sheets and a black Mini Photo Album Accordion book from Alpha Stamps (supply list featured below), I made a little photo album with a slipcase. Just 3" tall! 

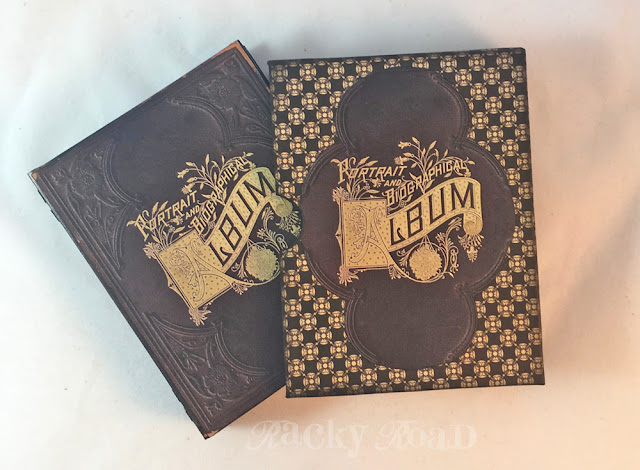
I used two copies of the Photo Album Covers collage sheet to make the cover of the book and the front of the slipcase. The collage sheet has a front and back image of the book covers. I used one image of the front covers for the front of the book, and cut the center part of the same front image out to place on the slipcase.

One copy of the back of the book was used for the actual back of my book, and part of the second one was used to cover the book's spine. I had a little scrap left, so I cut out one of the small flowers and a strip of the embossing and glued them on to the spine to give it more texture.
I used heavy cardboard for the covers of the book, and thin cardboard covered with scrapbook paper for the slipcase. There's a tutorial on how to make the slipcase below.
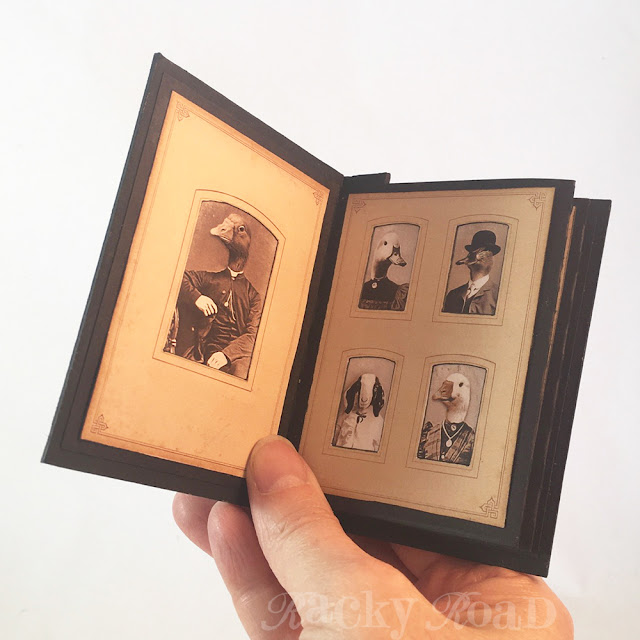
Let's look inside! The first page is the Duck and Goose family. Hey, wait a minute...what's that goat doing there? Surely that's a mistake.
Let's go on to page two. I love these colorful photo frames with the the flowers and birds, and the beautiful bunny sisters all dressed up in their Easter finest. Dangit, it appears that the same goat is photobombing the rabbit on the right.
And, the final page, with more sweet bunnies. Hey, now. This can't be right! What a rascal that goat is.
The spine of the book is only attached to the front cover. This way, the book can be opened out into an accordion, to view all the photos of the Easter family (plus several pics of that danged goat). The first and last pages are glued to the insides of the covers.
Here's a sample template for making the slipcase. I didn't include measurements, because this will vary depending on how thick you make your book. Once my book was constructed, I used it to make the template. I laid it down on the cardboard and traced around it for each side and the back, and left the top and bottom flap long so I could trim them to fit when the slipcase is assembled. Remember to allow for a little give wherever you have your folds, so the book will be able to slide in and out with ease. Here's what the cardboard looked like when it was all cut out. The dotted lines are fold lines. I scored the fold lines on the cardboard using a ballpoint pen and a ruler. That makes it much easier to make a nice crease.
Fold all your pieces in, and glue the tabs to the top and bottom. White glue works just fine for this. Once your box is constructed, wrap the outsides with scrapbook paper.
A circle template is a great way to make nice semi-circle cutouts on the sides of the box. I cut the semi circles out of the sides after I had constructed my slipcase, and I also painted the inside black after it was already put together, but you can learn from my process and do both of those things before you glue anything. It'll be way easier; trust me on this.

I hope you enjoy this little project. For a full list of supplies used, click here. Happy crafting!

Related Posts Plugin for WordPress, Blogger...